Saturday 12 December 2015

GLO MEGA CHEAP PLAN

campusBooster
Glo CAMPUS Data BOOSTER is a FIRST of its kind that offers up to 8 times the value of your data subscription while you are on campus at no additional cost or charges. For example, a N200 data plan gives you N1600 worth of data on campus.
PriceDataValidityOn Campus
N200200MB4 Days400MB
N500500MB7 Days1GB
N10001GB15 Days2GB
N20002GB30 Days4GB
N50005GB30 Days10GB
Available on Nigerian campuses nationwide, including Police, Customs and Immigration training institutes.
To buy these plans just Dial *777# and choose a Campus Booster Plan.
Click here for FAQs

HOW TO USE MTN BIS SUBRIPTION FOR BLUESTACK

 
homedownloadordersupportcontact
     
  Step-by-Step: Using BlueStacks AppPlayer From Behind a Proxy
 
Introduction
BlueStacks AppPlayer is a software that brings Android applications to PCs and Mac. This tutorial will show you how to install and use BlueStacks from behind an HTTP proxy.
A regular HTTP proxy is sufficient to provide access to the internet to BlueStacks itself and to the most of Android apps. A small amount of Android apps use network protocols other than HTTP and HTTPS. In order to proxify these latter apps, you will need a SOCKS or SSH proxy server instead.
The instructions below should apply to Mac OS X too as the setup procedure is very similar.
This tutorial has been written for the version 0.8.0.2997 of BlueStacks. If you determine that this tutorial is outdated, then please feel free to let us know by sending an email via our contact form.
 
Installation
Download and install ProxyCap. Restart your system when the setup program asks you to do so.
If you already have BlueStacks installed, skip to the next step. Otherwise, download the BlueStacks installer, and then run it. After installation completes, the installer will automatically launch BlueStacks. If your access to the internet is through the proxy server only, BlueStacks may stuck with the status "Downloading runtime data" or you may see a black screen. In any case, quit BlueStacks for the time being (right-click on the BlueStacks taskbar icon, and the click Quit).
 
Configure ProxyCap to work with BlueStacks (Typical Configuration)
We must define 2 separate proxy servers: HTTP and HTTPS. First let's add the HTTP proxy.
Right click on the ProxyCap taskbar icon and choose Configuration.

 
Click the Proxies category.
Press the New button on the toolbar.

 
Select HTTP from the Type drop down list.
Fill in the other settings.
Press the OK button.


Now add the HTTPS proxy. Set the type of the proxy server to HTTPS. The server address and the authorization settings should be the same as for the HTTP proxy.

 
Now let's create ProxyCap routing rules for BlueStacks. We will add 2 rules: one for the HTTP connections and the other for HTTPS.
Click the Rules category.
Press the New button on the toolbar.

 
In the Rule Action section, select the display name of the HTTP proxy server from the drop down list.
In the Program section, click Specify, then click the Browse button.

 
Navigate to the BlueStacks program folder. It is located in Program Files on 32-bit Windows or in Program Files (x86) on 64-bit Windows.
Select HD-Network.exe.
Press the Open button.

 
In the Destination Port Range section, click Specify, then type 80 in the first port field.
In the Rule Name section, enter a display name for the rule.
Press the OK button.


Now add one more "redirect" rule for HD-Network.exe but with the following changes:
1. In place of the HTTP proxy, specify the HTTPS one.
2. In place of the port 80, specify 443.


Click OK to save the configuration.
You are done, run BlueStacks and enjoy!
 
Configure ProxyCap to work with BlueStacks (Extended Configuration)
The above configuration is sufficient if your system uses a proxy server to connect to the internet. Besides HD-Network.exe, there are 2 other BlueStacks program files (HD-Agent.exe and HD-Frontend.exe) that require an internet access, but, unlike HD-Network.exe, they respect the system proxy settings. So this extra configuration step makes sense only if your system does NOT use a proxy server.
Select the first entry in the rule list.
Press the Properties button on the toolbar.


Select the Programs tab.

 
Add HD-Agent.exe and HD-Frontend.exe to the Program list.
Press the OK button.


Repeat the procedure above to add HD-Agent.exe and HD-Frontend.exe to the Program list in the second rule.
   
   
© 2015, Proxy Labs. All rights reserved.

Saturday 5 December 2015

IDM 6.25 Serial key and crack download

IDM 6.25 Serial key and crack download

Hello welcome back here is the new updated IDM 6.23 Serial key and crack exclusively for our members


Note: Please note that You should turn off your internet connection before trying to apply these keys. or else keys wont work properly.

You can enter any first name, last name and email.

So here is the serial keys enjoy man! Thanks.

629U7-XLT5H-6SCGJ-2CENZ
L67GT-CE6TR-DFT1D-XWVCM
XONF7-PMUOL-HU7P4-D1QQX
F9TZ9-P6IGF-SME74-2WP21
CJA0S-K6CO4-R4NPJ-EKNRK
N0Z90-KJTTW-7TZO4-I27A1
Like This Post? Please share!
Subscribe through e

avast secureline VPN lincense file


avast! SecureLine VPN
Secure and encrypt your communications, making your login details, VoIP calls (e.g. Skype or Viber), and other personal data immune to hackers on any network — even public WiFi.
You can also anonymize your browsing and download histories so that your surfing habits stay invisible. And if your favorite websites extend beyond your borders, unblock geo-restricted content by making your IP address look as if it originates from a different country.

Features
  • While connected, stay safe – It’s easy for hackers to tap into your communications when you’re on public Wi-Fi. But even on other types of connections, SecureLine VPN anonymizes your browsing and makes your logins, emails, instant messages, and credit card details invisible to spying.
  • Play content from all over the world – “This content is not available in your country”? No worries! SecureLine VPN makes you look like you’re connected from a different location, allowing you to view ‘local’ content anywhere. VPN tunnel available via the U.S., United Kingdom, Germany, the Netherlands, Czech Republic, and Singapore.
  • On/Off. That’s all it takes – Gone are the days when you had to be an IT programmer to use a VPN. Switch on your SecureLine with one big button. Or, set it to shield you automatically whenever you are on public/open Wi-Fi…
  • Inside your Avast or standalone – You can install your SecureLine VPN for Windows as an add-on to any Avast antivirus or as a standalone app, whichever you prefer.
How to Activate?
Simple Method
  1. Install as an add-on to any avast! antivirus
  2. Double-click on the license file
  3. When a pop-up will appear just press “Yes”
Alternate Method
  1. Install SecureLine VPN as an add-on to any avast! antivirus
  2. Open avast!
  3. Go to “Settings” and then “Subscription”, you’ll see the option “Already have a license? Insert it here”.
  4. Click on “Insert it here” and browse for the file & open
You’re Done!!! ENJOY!!! :-)
NOTE: Please disable your “Windows Firewall” and use only “avast! Firewall”.
SecureLine VPN Standalone version will not work
SCREENSHOT-

DOWNLOAD AVAST SECURE LINE SETUP
DOWNLOAD LICENCE FILE
UR LIQUIDX   

Friday 4 December 2015

chipest glo data bundle

new12
Our variety of data plans ensure you get the best value at your own preference. Our data plans range from daily, weekly, monthly and Flexi plans to Blackberry Plans including plans for Blackberry 10 devices.
We offer much more data volumes for much lesser prices. We also provide a self care data management portal, the High Speed Internet (HSI) portal where you can view your data usage, share data, buy data and gift data, available at http://hsi.glo.com.
Dial *777# or visit hsi.glo.com to buy and manage subscriptions (Applicable to mobile devices Using the Glo Bolt Internet service).

Plan Details
Data Packs
Data PackPrice (N)Opt In Code
1 Day PackN50Dial *127*14#
3 Day PackN100Dial *127*51#
7 Day PackN200Dial *127*56#
Daily Plans
Plan NamePrice (N)Data VolumeValiditySMS to 127USSD Code
Always Day500195MB1 Day10*127*3#
Instant Surf10020MB1 Day51*127*51#
Smallie20050MB3 Days56*127*56#
Weekly Plans
Plan NamePrice (N)Data VolumeValiditySMS to 127USSD Code
One Week40065MB7 Days52*127*52#
Big Week500150MB7 Days57*127*57#
Monthly Plans
Plan NamePrice (N)Data VolumeValiditySMS to 127USSD Code
Always Micro1,0001.2GB30 Days53*127*53#
My Phone2,0002.5GB30 Days55*127*55#
So Special2,5004.5GB30 Days58*127*58#
Always Min5,00012GB30 Days11*127*2#
Always Max8,00024GB30 Days12*127*1#
Silver10,00011GB30 Days15*127*11#
Gold15,00017GB30 Days16*127*12#
Platinum18,00021GB30 Days17*127*13#
 Flexi Plans
Plan NamePrice (N)Data VolumeValiditySMS to 127USSD Code
G 1006,0004GB100 Hrs or 30 days20*127*5#
G 30015,00012GB300 Hrs or 3 Months21*127*4#
G-Leisure5,0004GB8 AM to 9 PM – daily + All day on Weekends30*127*7#
G-Work6,0004GB8 AM to 9 PM31*127*6#
Glo CAMPUS Data BOOSTER**
PriceDataValidityOn Campus
N200200MB4 Days400MB
N500500MB7 Days1GB
N10001GB15 Days2GB
N20002GB30 Days4GB
N50005GB30 Days10GB
**Click here for more info on Glo CAMPUS Data BOOSTER

Data Calculator
How Much Data Do I Need?
DataUsage
100MBSurf the web for 10 hours or Check 2000 emails or Watch 50 mins of video streaming
500MBSurf the web for 50 hours or Check 10,000 emails or Watch 4 hours of video streaming
2GBSurf the web for 200 hours or Check 40,000 emails or Watch 20 hours of video streaming
6GBSurf the web for 600 hours or Watch 60 hours of video streaming or Use your mobile as modem
* Usage is a guide only based on the following assumptions: Web browsing = 10MB per hour, Email = 50KB per email, YouTube streaming = 2MB per minut

Sunday 22 November 2015

How To Browse Unlimited on MTN With N0 Naira Using Simple Server on Android and PC


How To Browse Unlimited on MTN With N0 Naira Using Simple Server on Android and PC

167
Hello people, here is an exciting piece of information reaching me from a friend about Simple Server Android and PC app. If you’re are not using MTN on Simple Server then you’re truly dulling your spirit, the information reaching me which I’ve duly tested is that you can easily browse unlimited on MTN With N0 Naira Using Simple Server on Android and PC.
This is a trick that doesn’t require you to tweak or alter your imei, just insert your Zero naira (N0.00) MTN Sim into your phone plus do some configuration on your simple server in the format below and you’re good to go. There’s no limit to what you can download, so download while it last.
Warning; Simple Server App is a rogue app that makes your device extremely hot whether on Android or PC so I may not be held responsible if this app cause any damage on your device.

HOW TO CONFIGURE SIMPLE SERVER TO BROWSE ON ANDROID AND PC WITH #0.00 NAIRA ON MTN.

Simple server
If you’re viewing this page on OperaMini or other static browsers and not seeing the required settings.. Kindly copy and paste the web address to Google chrome, UC Browser or your default Android browser to view and UNLOCK settings. There is an unlock button that requires Ajax loading.
SIMPLE SERVER SETTINGS ON ANDROID 
1. Download and Install simple server.
2. Configure the settings in simple server exactly as higlighted below :
Injection Query/Url; http://server4.operamini.com
Injection Host ; server4.operamini.com
Create a new APN  on your Android device with..
APN: web.gprs.mtnnigeria.net
IP : 127.0.0.1
PORT : 8080
SIMPLE SERVER SETTINGS ON PC
1. Download Simple Server for PC
>>Download Link 1 (Add settings manually using .INI)
>>Download Link 2 (Recommended: Settings have been added)
2. Extract zipped file using Winrar.
3. If you downloaded Simple Server via link 1 or have Simple Server already on your PC. Edit the simpleserver.ini file that you extracted from Zipped folder with the codes below, just change the settings in the  .INI file or copy and paste settings below into the simple server .INI file.
LHOST = ‘127.0.0.1
IMETHOD = 0
ISPLIT = 0
RHTTP = 0
TIMEOUT = 60
PHOST = ‘010.199.212.002
RQUERY = ”
RPATH = 0
PTYPE = 0
KEEP = ”
BQUERY = ”
MQUERY = ”
RHTTPS = 1
PPORT = 8080
LPORT = 8080
VALHDR0 = ‘ server4.operamini.com ‘
VALHDR1 = ”
VALHDR2 = ”
VALHDR3 = ”
IQUERY = ‘ server4.operamini.com ‘
ADMODE = 0
CQUERY = ”
CUSHDR2 = ”
CUSHDR3 = ”
CUSHDR0 = ‘Host
CUSHDR1 = ”
ILINE = 0
FQUERY = ”
SBUFF = 1024
RPORT = 0
4. Insert and set APN  on your modem to…
APN: web.gprs.mtnnigeria.net
5. Configure your browser (Opera, Mozilla, Chrome etc)
IP : 127.0.0.1
PORT : 8080
6. After everything is well setup, do this…
Connect modem >> Open Simple Server.exe >> Open configured browser >> Pay credits to naijaknowhow.com for the info.
Also see How to Browse Unlimited on MTN and Etisalat via Tweakware VPN, it doesn’t need too many setting up process, just install, subscribe and run.

How to Power All Apps on Simple Server (Android)

Here is a simple App that will help you to power all App on Android if you’re using Simple Server. you can use either of ProxyDroid/Autoproxy Lite, both apps can help you to set the proxy (http / socks4 / socks5) on your android devices, it helps you to bypass custom proxy using a single switch button. You are basically going to love these App.
How To Use Autoproxy Lite
1. Download and install.
2. Configure Host127.0.0.1 and  Port8080.
auto proxy
3. Hit the connect button after setting up.
autoproxy
How To Use ProxyDroid
You must have connected your simple server on android before doing the steps below.
1. Download ProxyDroid.
Open ProxyDroid
Open ProxyDroid
2. Install and open ProxyDroid.
3. Configure
Host127.0.0.1  Port8080
Edit proxy to 127.0.0.1
Edit host to 127.0.0.1
Edit host to 8080
Edit port to 8080
4. Enable proxy switch and start surfing.
Enable Proxy switch
Enable Proxy switch
Yeah that’s all, that’s all you need to do to browse unlimited on MTN with N0 Naira using Simple Server on PC and Android phones. This particularly works with N0.00kobo and it has been tested and confirmed. Don’t forget to check this simple server settings which have also been tested and confirmed working.
Use the comment box if you ever experience any problem while configuring it. Have a great Simple day and remember to Serve a friend with this Simple N0.00k trick using the share buttons below!
bbmlogoIf you find this information useful then you should subscribe to our BBM channel to get Instant Updates on your BBM feeds or search for C

Monday 16 November 2015

A breathtaking news for non MTK Android users and PC users I must say. with this new way of subscribing for MTN Bis, users of Samsung, HTC, Nokia Androids and PC will have access to enjoy same amount of data as blackberry users.


Some days ago, a friend of mine complained to me that Airtel have suckled his pocket dry. He said, had it been he calculates the money he use to subscribe for airtel Bis every month, he would need a small calculator to count his fortune... I was like,'dude? Why not dump airtel and embrace Glo  or mtn instead of wasting your house rent on airtel?

No doubt they're lots of freebies this ember month... And smart peeps have being rocking and enjoying this freebies since the time of Abraham.

All thanks to yomiprof for showing us how to effectively use mtn Bis on our Samsung and other Android devices (MTK/Non MTK ) including PC's with simple server.

To Enjoy  Mtn Bis On Your Samsung And Any Other Android Phone, Follow The Instructions Below.

1. Download and install simple server with the link provided below.

2. Goto your phones settings-Mobile network -MTN. create a new Apn and fill it as seen below.

Name: simple server

Proxy: 127.0.0.1

Port: 8080

Apn: Web.gprs.mtnnigeria.net

3. Save settings by clicking the back button... Make sure to tick it.

Now launch your simple server and input the settings as thus seen below

Pproxy host: 10.199.212.2

Proxy Port: 8080

Injection Method: get

Injection querry/url: http://web.blackberry.com

Injection Host: web.blackberry.com

Injection line: press your enter key 4 times

Log leve: debug

Close the settings and click the start button with your mobile data switch on.

No4 will power up your whatsapp and Facebook.

4. Download Autoproxy from Google PlayStore.

5. Launch AutoProxy and Set

Proxy Host: 127.0.0.1

Proxy Port:  8080

Proxy Type: HTTP

Authentication settings thick box

Username/Password: Web

Save and that's it.

Download Simple Server.apk For Android

This Post have being confirmed working and genuine... Please post your thoughts and ask questions where you think you've made a mistake.

Enjoy.

For those who haven't received airtel free 200 MB, just follow the instructions as seen below.

Dial *106#

141*13*200#

If you're lucky, 200mb worth of data will be allocated to you....of course you will be lucky.

Update (07/02)

It seems AutoProxy no longer powers the whole apps.

Use ProxyDroid Instead and follow this settings

Launch your ProxyDroid

Locate and input

Host: 127.0.0.1

Port: 8080

Save and enjoy.

Download ProxyDroid here

Or you can also use GAE PROXY with the settings below.

1. Open google play Store Search and download GAE proxy.

2. Launch and  Tick connect at boot.

3: Enable proxy switch

4. Click the connect button and start enjoying

Download GaeProxy  here

Make sure you've subscribe For either mtn BBCDAY or any other Bis package before powering the apps.

You shouldn't have any money in your sim card once you've subscribe if not, it might attract some unnecessary deduction of money.


Posted by www.Bona9ja .Com on - Rating: 4.5

Title : How To Subscribe for mtn Bis on your Samsung, PC and other Android devices With Simple server.

Description : A breathtaking news for non MTK Android users and PC users I must say. with this new way of subscrib...

Tuesday 10 November 2015

okweimat seriel number

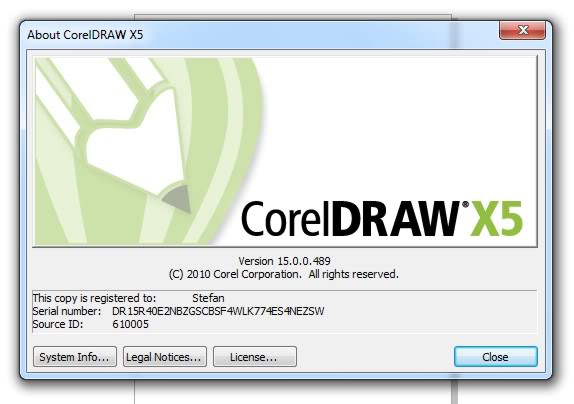
DR13CUB-5516569-VUL OR DR13WTX-0000046-GDR OR PURCHASE KEY: DR13WCG-2734035-CRX - ACTIVATION CODE:ABBD-175D-B0E0-9F68-5D70 OR SERIAL:DR13WUZ-0065131-KXG ACTIVATION CODE:A4B3-3536-C45F-2C7A-82B3 OR SERIALNUMBER: DR13WRJ-3923729-XYG ->> ACTIVATION CODE:10C2E0AA02E2E3307851
PURCHASE KEY: DR13WCD-1668628-TWW ACTIVATION CODE:749E-63A4-938C-930B-7FF9 OR DR13CEM-2945491-UHN
SERIAL: DR13WER-4691278-WLP / ATIVACTION: 73E2-F808-57B4-6D01-37F3
CorelDRAW Graphics Suite X3
DR13CUB-5516569-VUL
CorelDRAW Graphics Suite X3
DR13WTX-0000046-GDR
CorelDRAW Graphics Suite X3
Purchase Key: DR13WCG-2734035-CRX - Activation Code:ABBD-175D-B0E0-9F68-5D70


Coreldraw x3 Graphics Suite Crack, Serial Number Full Download

Coreldraw x3 Graphics Suite Crack, Serial Number Full Download

Coreldraw x3 Graphics Suite Crack, Serial Number Full Download

CorelDraw Graphics suite:

Attention, if you are a professional graphics designer or editor and want to make your graphics just perfect & want to draw a masterpiece so that you can impress your clients then you must download and install this software which will give you all the things you need to do your work perfectly. Yes you are getting right I am exactly talking about CorelDraw Graphics suite.
It’s stunning software which is being widely used for editing the graphics. Corel Draw X3 Serial Number with Crack and Activation Keys Full Free is developed and advertised by Corel Corporation of Ottawa, Canada and it’s also known as Corel’s Graphics Suite. It acts as graphics editor and Corel Photo Paint, bitmap image editor, and many other graphics-related programs as well. This software fulfills all the requirements you need to make a masterpiece.

Full comprises the lots off multiple Features someone mentioned here:

  • This software includes double click crop tool and very firstly allows you to crop the bitmap images. It includes several tools such as Smart fill tool, Image Adjustment Lab, Chamfer/Fillet/Scallop/Emboss tool

You can also install this software with following Directions:

  • Copy and paste options will not work so you have to comprise the manually key in all serials/activation instructions.
  • There should be no internet connectivity while its installation get completed.
  • Later Type once more.
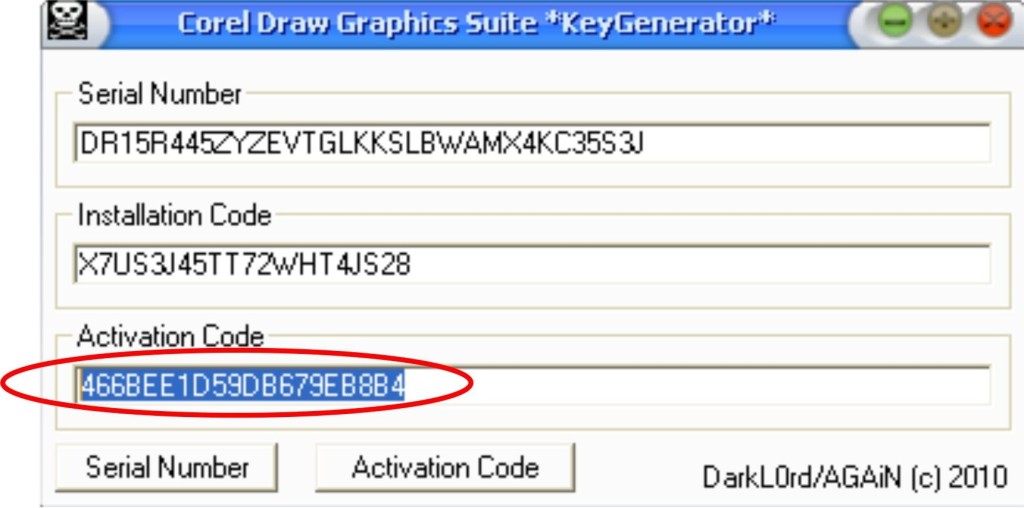
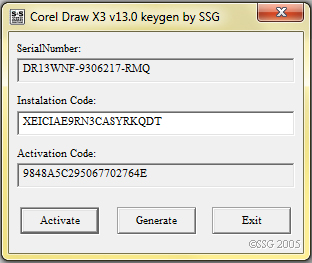
  • Just Press “Phone”, and copy the installation IDto the keygen and create activation code.
  • Later Unzip the setup of this software simply Run our keygen and install using the serial number from keygen. Don’t close keygen. So you should not be connect with internet till the entire procedures of installation ended.
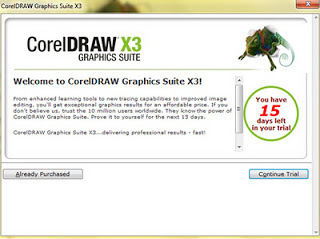
  • Simply Press “ready purchased”.
Further Type the activation code into activation dialog, and activate this program.

Screenshots:

Coreldraw x3 Graphics Suite Crack, Serial Number Full Download

Coreldraw x3 Graphics Suite Crack, Serial Number Full Download

You Can Download Coreldraw x3 Graphics Suite Crack, Serial Number From Given Links…